The Best Hardware For YouTube Videos

If You Want To Start A YouTube Channel, It's Worth Knowing What You Need

If you are looking to start out on YouTube then the chances are you are going to need some direction when it comes to choosing your YouTube video hardware – things like a camera and a microphone are pretty easy pieces of kit to pick up based on a beginners knowledge, but did you know that there is actually a lot more out there you might need for your YouTube career than you might expect?

Don’t worry – I know it can all be overwhelming, so here is a list of the most important hardware for YouTube videos you need to make sure you have a fruitful YouTube career!

Your Camera

We will start off with possibly the most important part of any YouTuber’s arsenal: the camera. When it comes to choosing the best camera for YouTube you will have a few questions to ask yourself – mainly how much you are willing to spend, and the main format that you are looking to make your videos in.

The truth is that if you are looking to do some regular commentary videos and reaction content, a laptop’s webcam just isn’t going to cut it – you are going to have to make an investment. Sure, the camera will function fine and you will be able to record yourself, but don’t expect massive view counts and rising subscriber numbers, because the harsh reality is that YouTube viewers are so used to getting quality content on their screen, and that means uploading a video with a decent picture quality.

The good news here is that you are going to have a pretty wide selection when it comes to the type of camera that you want to buy for your channel – and depending on the amount of cash you want to put down and the specific type of vlogging you are looking to take part in.

The first thing you should know is that lots of YouTubers are depending on their DSLR cameras for their video and live stream needs – which is pretty amazing as a video creation solution, as a large portion of the DSLR cameras on the market today are very readily capable of capturing high-quality footage. Plus, you get to use them for more than just YouTube on their own terms, as they are still going to function just fine as everyday cameras.

So, if you are looking to start out and not break the bank too hard on your first YouTube camera, then you can look into the Canon EOS 70D. I have to admit here that this isn’t exactly a groundbreaking suggestion, but that isn’t a bad thing: The Canon EOS 70D features frequently on lots of other lists of the best cameras for YouTubers, and it’s with good reason – it’s inexpensive, easy to use, produces high-quality images and is a pretty great workhorse model camera rather than being specialized in one particular area.

So, if you were looking for some guidance on what camera to get yourself – that would be my pick for your first foray into filming. The question is though, how are you going to get your audio recorded?

Your Microphone

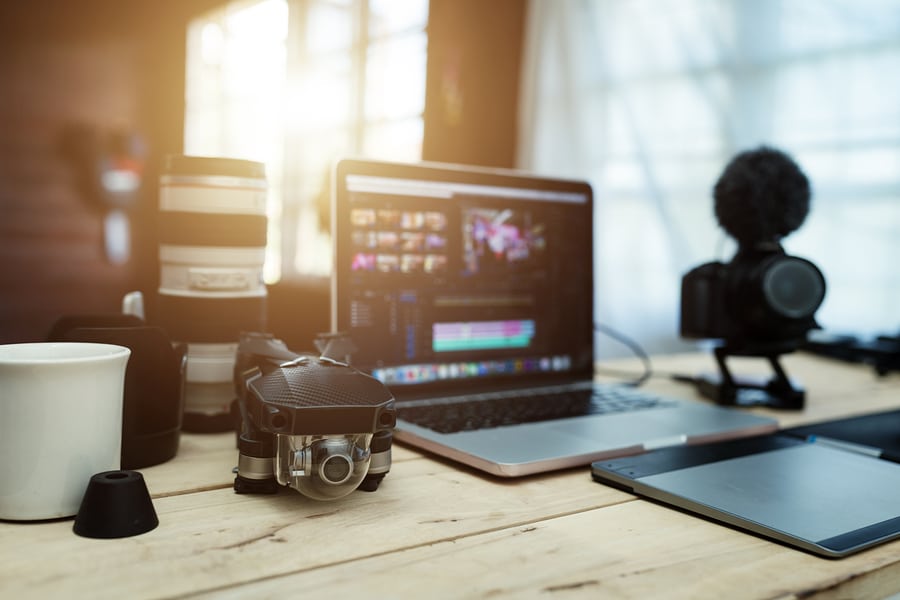
When it comes to recording audio for your YouTube video, there are plenty of options out there – if you have a laptop, for example, you might be tempted just to use the built-in microphone in the laptop itself, and from a quality standpoint, I can firmly tell you that is not a good idea.

Instead look to some of the third party simple microphones on the market today that are going to give you much better audio quality when it comes to finally uploading your video to YouTube itself, rather than relying on trash directional mics fitted next to cameras and inside phones.

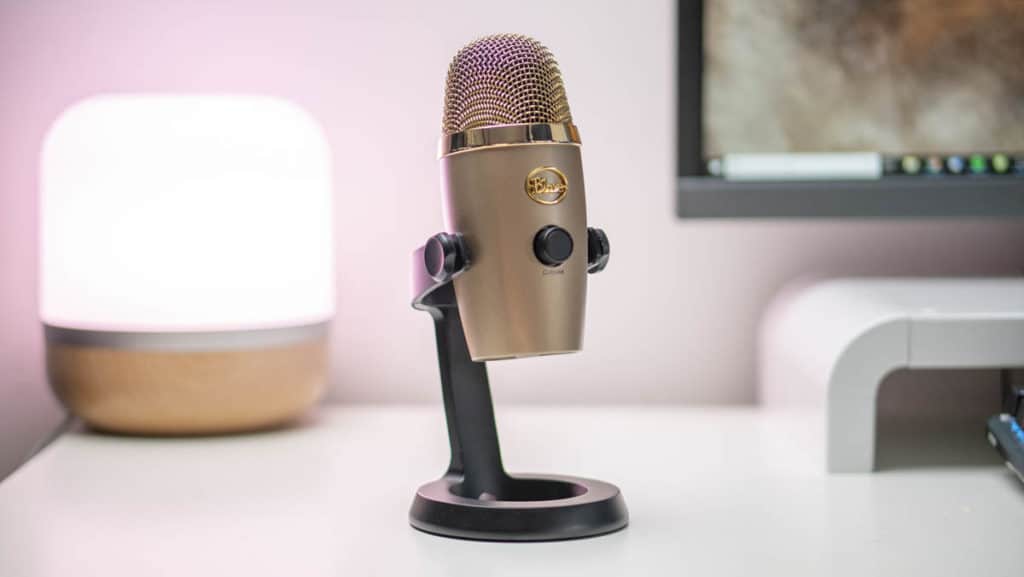
First, have a think about the Blue Yeti microphone. This thing has long been a favorite of YouTube creators and live streamers because of two simple reasons.

The first is that it’s ridiculously easy to use. The Blue Yeti microphone relies on a USB connection to work, so all you have to do to get it working is hook it up to your PC or laptop and you are away, it’s recognized as a viable audio input and you are set to record. You can even have it connected to your iOS or Android device, so you don’t need to worry about complicated setups and wired configurations when you are using it. Like I said, simple.

The second big advantage to a Blue Yeti mic is that the sound quality that it outputs is crazily good for such an inexpensive piece of kit. You can rely on it to provide one of three different audio input settings based on the scope of sound it’s recording, from omnidirectional to single channel – which is pretty handy if you are going to be using your microphone for a number of different purposes – say you want to stream one night, then use the microphone to record a podcast or do voiceover the next – the Blue Yeti will be able to do just that for you.

Basically, if you are looking for a reliable classic microphone, then the Blue Yeti is going to be the way to go if you are a beginner. But, what if you are looking to produce some content that won’t be based around sitting at a desk, and you need a microphone that’s more capable of capturing audio when you are stood presenting? You are probably going to need a lapel mic.

A lapel microphone is a lot cheaper than its conventional desk-based counterparts – and it does exactly what it says on the tin. Basically you pin it to your lapel (or collar, or just your shirt), and it will capture audio as you speak, and input it into whatever you want to input your audio into. Now, this could be a wireless receiver unit (which can be a hassle) or, for the sake of ease, into your phone (which makes capturing audio much easier).

The sound quality with a lapel mic might be an issue for you though. Aside from the fact you might come into issues with various mouth noises, you also have to contend with the rustling of clothes and other environmental noises which might be more present on cheaper mics. Check out this lapel model made specifically for smartphones by Rode Smartlav – sure it might be more expensive than some of the other lapel mics on the market, but it will offer you a better sound quality, and when it comes to producing videos of a high standard, that’s what it’s all about.

Your Lighting

This is an area that’s often overlooked when it comes to producing your own YouTube videos, but I can tell you now that it is, in fact, one of the most important aspects of a YouTube video, and that you are going to need good, consistent lighting in order to produce quality content.

So, what’s the best lighting for YouTube videos? And for that matter, what’s the best kind of light to make videos with? Well, considering that this article is being written with the amateur in mind, I’m going to present you with two different options, both easily affordable and simple to manage, that should give your videos a boost in the quality department.

The first option is natural light, and that basically means sit near a window. This isn’t a recommended solution though – let me run through some of the pros and cons. With natural light, you need to first make sure that you are going to be recording in an area with unfettered access to a large window, which will in turn let in enough natural light to keep you looking well lit at all times. Now, this can be difficult for a number of reasons, including the fact that clouds and nighttime exist, basically excluding you from recording whenever they happen to cross the sky.

A well-lit room is essential for a good quality video, it hides the blemishes and visual noise that you so often see on low light videos, so maybe relying on natural light isn’t for you. This might be hard to hear, especially considering that this option is free (and if easily available, a great alternative to manufactured light), but don’t worry because the second option I’m offering up is budget-friendly as well, and that’s the ring light.

These lights came to popularity thanks to makeup and hair tutorial videos, because they can light up a subject in a video very well, and very easily. But following that they have since become popular in the YouTuber community because of the simple way that they light up a face, or person, in a camera’s frame.

You can find them for sale online at prices ranging from $20 onwards, so they are completely inexpensive, and they run from a regular outlet too. If you were worried about producing a consistent and high-quality lighting arrangement for your YouTube videos, and thought that it would take the likes of lighting umbrellas and professional-grade lighting, then rest assured there is a much simpler, cheaper solution in a ring light.

Your Green Screen

This might not be a total necessity for you, especially if you are looking to get into vlogging and want a real-world look on your channel, but the fact is if you want yourself a professional grade YouTuber setup then a green screen is going to be invaluable as an effects device, or even as a de-facto background so that you can record from anywhere with a consistent and user recognizable background.

The truth is that green screen technology is actually incredibly crude – you could be looking at something as simple as a green sheet of canvas that you can throw up on a wall behind you – and that will get the job done, but It might not be ideal (or all that professional, or easy to store).

If you want something a little more conservative when it comes to storage, and easier to work with placement wise then have a look into different collapsible options online. These types of greenscreen offer a simple flat surface behind the user which makes effects placed on them much easier to work with (no dark spots or warped assets) and when they are done they are easy to collapse, pack away and return whatever room it was you were working in back to its normal order.

Pretty handy if you are pushed for space but still want professional-grade after effects.

Your Monitor

Now when it comes to video editing and so on, I could write pages on the best kind of computer for video editing out there, how to build it, and all the other types of things you need to consider when you are putting together a YouTuber PC build. And I did. In this article right here, so I don’t need to do it again.

What I will run through here though is what you want from your monitor you will be using with your PC. The first thing I’m going to mention is input connections. Ideally, your monitor is going to be capable of supporting a couple of inputs, just in case you want to have a streaming setup where your PC, console, and a video capture card can all be connected at once. Even if that isn’t what you are going for, I guarantee that being able to have multiple inputs is going to be invaluable for your monitor.

Now let’s talk about the color palette. HDR is big in the visual nerd’s world right now, so ideally the monitor you choose to do all of your editing on will be able to support and process HDR just so you can get that dynamic color into your video. HDR offers a much more accurate look into the color grading of your video as well, making your job in post-production much easier when it comes to fixing colors.

Your monitor’s resolution should be high as well. You might not want to aim for a 4K monitor – but be aware that more people want high-quality videos on YouTube, and the only way to produce it correctly is with a monitor capable of offering 4K itself. So, whilst it isn’t essential it’s still something you should seriously consider.

And right now I can imagine there is a high percentage of people reading this screaming about how expensive this all sounds – but the truth is, it’s quite reasonable. The BenQ EW3270U for example is a 32-inch monitor that offers 4K and HDR compatibility, with a 60hz refresh rate and LED display. It even comes with USB-C connectivity, which means you are going to be spoiled for choice when it comes to your input selection.

The best part? It’s less than $450. Basically, you can get yourself a fantastic monitor for video editing (a crucial part of any YouTuber’s day) for a pretty low cost, and it will double up nicely as a gaming monitor for PC or console if you need it.

In summary: Don’t cheap out when it comes to your PC monitor – your audience will be able to tell if you are slacking or missing crucial elements in the editing bay when its time to upload.

HDMI Splitter

Honestly, this isn’t all that necessary for a YouTube career, but I’m going to recommend it anyway just because it can make your life so much easier to have on your desk.

A splitter is a device that you hook different HDMI inputs into, which is then able to choose between the different input cables and select one signal to send to your monitor (or TV). Why is this a must-have for a YouTuber though?

Well, think about all those different cables running through your room to your monitor. First, you have the PC itself you do your editing on, and then you have the camera you are recording with. If you are streaming games you then have a PlayStation, an Xbox, or Nintendo to think about, and that’s not to speak of color calibrators or ChromeCasts you might want in there for whatever reason.

Basically an HDMI splitter is going to give you a little breathing room when it comes to cable management and remove the stress of having to unplug and reconnect your different HDMI cables as you work.

Like I said, not essential – but you won’t want to live without it when you have it.

And that just about wraps up our hardware essentials for YouTube list – but obviously you don’t have to stop here. It could be that you’re reading this to be the next big streamer and need a gaming PC to match your ambition, or that you want to demo your music on YouTube and need to get yourself a PC that is capable of supporting your home recording dreams – don’t worry. Just read those linked articles and you will be all set when it comes to deciding what you need.

Otherwise, if you have any suggestions for other YouTube tech essentials that you didn’t see on this list, just put them in the comments below. Anything that we see which could help out our readers, we will be sure to slot into the article itself!